In this post, we’ll be talking about how to put LED lights on a mirror. It’s a simple and fun project that will make your daily grooming routine more convenient and satisfying.
How do you put LED lights on a mirror? You can use an LED light strip and attach it to the surface of the mirror glass or on its frame. For balanced lighting, attach the LED lights on all four sides of a square or rectangular mirror. Connect the LED strips to a power supply unit, then plug the power unit into an electrical outlet.
It may sound complicated, but the process of putting LED lights on a mirror is easy once you have all the materials ready. We’ll go into the process step by step in three parts to give you a better idea of how it’s done. Ready? Let’s go!
How to Put LED Lights on a Mirror
Installing LED lights on a mirror can be done by attaching a strip of LED lights onto the frame or glass surface of the mirror. The LED strip should ideally be placed on all four sides so the lighting will be perfectly balanced and all parts of your face and neck will be illuminated. If the mirror doesn’t have a frame, you can attach the LED strip light directly onto the surface of the mirror, creating a thin lighted frame.
LED lights to need electricity to work, so you need to make sure there’s a suitable power outlet to connect the lights to. It’s important to follow the manufacturer’s instructions for attaching the LED light strip into a compatible power supply unit and connecting it to electrical power.
This is the easiest and simplest method of putting LED lights on a mirror. We’ll go into the step-by-step process below.
Part 1: Preparing the Materials
Part 1 of this DIY lighted mirror project is the preparation stage. For this preliminary step, you’ll need to prepare and measure your mirror, acquire LED strip lights, and get a compatible power supply unit.
Preparing and Measuring the Mirror
The first step is to prepare and measure the mirror you want to put lights on. For this project, it would be easier to use a square or a rectangular mirror. If you have a framed mirror, it’s ideal to put the lights on the frame itself.
Use a tape measure or a ruler to measure the top, sides, and bottom part of the mirror where you want the lights to go. If the mirror does not have a frame, make your measurements an inch from the edges. This way, the lights would serve as a border or a lighted frame.
Take note of the measurement because this will give you an idea of the length of the LED strip light you’ll need. If you want the lights to be brighter, multiply this measurement by 2 and then add an allowance of about 4-6 inches in case you need to adjust the lights.
Getting LED Strip Lights
For this project, you will use LED strip lights, also called LED tape lights. LED strip lights come in a roll or a reel and have an adhesive backing that makes them easy to stick to a surface.
Choose a warm white color temperature with a Color Rendering Index or CRI of at least 90. This is closest to daylight or natural light and would render colors accurately. Check to see if the length of the LED strip is enough for your project, based on the measurement of your mirror.
Getting the Power Supply Unit and Connectors
To connect the LED lights to electricity, you’ll need a power supply unit and LED strip connectors. The power unit looks like an adaptor for laptops and other electronic devices. It should be compatible with the voltage that the LED strip lights use. The LED lights connect to the power supply unit, which is then plugged into a power outlet near where the mirror would be placed.
If you’re not sure about the type of power unit and other accessories you’ll need for your LED lights, you can get all of these as a bundle. Some manufacturers and distributors sell LED strips as part of a lighting kit complete with accessories. You can even choose to buy a dimmer along with the LED strip and power unit.

Part 2: Installing the LED Lights
This is the main part of the DIY lighted mirror project, and it’s where you attach the LED strip light to the mirror, connect it to a power source, and test it.
Attaching the LEDs
Once you have your mirror, the LED strip, and the power unit ready, you can start attaching the LED lights to the mirror. Cut the length of strip light you need based on the measurements you’ve made. Make sure you only cut along the designated cutting point as shown in the LED strip instructional manual which is included in the package.
Next, wipe down the part of the mirror’s frame or glass where you will be putting the LED lights. It’s important to remove any dust or oils from the surface so that the lights will adhere better and stay put.
After cleaning the mirror, peel off the adhesive backing from the LED strip and carefully stick the strip on the mirror’s frame or surface. LED strip lights are flexible so you can bend them around corners. Check out this video to see how it’s done.
Take time to make sure each part is taped down well. If there is any part that won’t stick to the surface, you can use thin double-sided tape to secure the strip on the mirror.
Connecting the Lights to the Power Supply Unit
After you finish sticking the LED strip onto the mirror, you need to connect it to the power supply unit. The method of setting up the strip light and connecting it to the power supply unit varies because this would depend on where you purchased these components and the design of the strip.
You can find a ready-to-use LED strip with a DC receptacle at the end or come with solderless connectors so you can easily connect the strip to the power supply unit. Check the instruction manual included with the lighting kit so you can be guided accordingly.
Testing the Mirror Lights
Once the electronic components are all properly set up, it’s time to test the LED lights. Plug the power supply unit into an electrical outlet, preferably the one nearest to where you’ll be putting the mirror.
If the LEDs around the mirror light up, it means you’ve connected them properly. If they’re not lighting up and you’re sure there’s nothing wrong with the electrical outlet, then you’ll need to go back and check the connections. Make sure you unplug the power unit first before checking and making the necessary fixes to the LED wiring.
✅ Video – $20 LIT VANITY MIRROR
This video, shared by YouTuber Deanndra Nunnery, shows a DIY lighted mirror project like this article. In the video, Deanndra shows how she modified a mirror to turn it into a lighted mirror for her vanity table. Watch the video to see how she did it.
Part 3: Mounting the Lighted Mirror
After checking to see if the LED lights work as they should, you can now hang your lighted mirror. But before you do that, make sure the mirror is clean and that the wall mount is secure so that the mirror stays in place. Follow these tips for proper mirror installation.
- If the mirror has an existing wall mount, check it to see if it’s still in good condition. Some mounting hardware may wear out over time, so it’s better to be careful and replace rusty or loose components with new ones.
- If you are installing your mirror in a new spot on the wall, make sure you use brackets and screws that would suit the type of wall you have. Consider hiring a handyman when needed.
- Wipe the surface of the mirror clean before hanging the mirror. Take care when cleaning around the LED lights.
- Make sure the power supply unit is placed in a safe, cool, and dry spot and that the plug doesn’t wiggle in the outlet. Use a cable tie to keep the wires in place, especially if the power cord is long.
- Check the LED lights from time to time to see if the adhesive backing may need some reinforcement. It’s common for strip lights to sag or falls off, especially if the mirror is in a humid area. We recommend using a high-bond double-sided adhesive or mounting tape for parts of the LED strip that won’t stick.
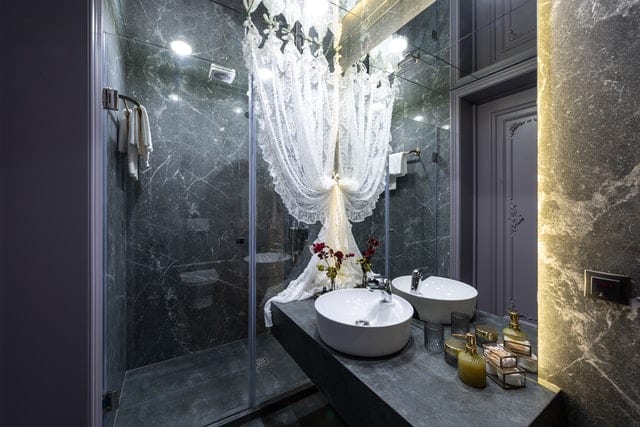
Photo by Max Vakhtbovych from Pexels
How do You Attach LED Lights to a Mirror?
There are many ways to attach LED lights to a mirror and enhance its functionality and aesthetics. You can create a DIY backlit mirror by using LED light strips. Attach the lights around the mirror and connect them to a nearby electrical source. You can also use light bulbs for a classic and elegant look. LED lights do not only add aesthetic value to the mirror but will also make it more functional.
Stick On LED Lights for Mirror
These types of LED lights are ideal for all kinds of mirrors. It can be able to transform your makeup mirror into a more stylish one. Moreover, it is also a good alternative if you do not want to purchase expensive makeup mirrors with LED lights. You can easily stick the lights on the mirror to upgrade its look.
Backlighting
You can add the stick-on LED lights at the back of the mirror for a soft diffused flow that draws the eye and also acts as the ideal source of indirect illumination when using the mirror. The light remains ambient which makes it perfect for decorative applications. Some mirrors may have a short frame wherein the glass has been recessed. The edge of this mirror is ideal for adhering to LED strips that face in an outward direction. To install the light, measure the total dimensions of the backside edge so that you will have the right length of LED light strip to fit the mirror. Stick the lights at the back of the mirror and connect them to a power source.
Built-in Lighting
Another option that you can have is to create built-in lighting for your mirror. This is a good option for functional mirrors in closets and bathrooms that requires higher lumen output to accomplish certain tasks easily. You can attach the LED light strips behind a sand-blasted mirror so that the light will come through in a diffused glow. Using the right tools and a whole lot of creativity, you can be able to create stylish and functional built-in lighting for your mirrors.
In-wall Lighting
This provides the same effect as the built-in lighting but can be able to achieve a more direct diffused glow without additional glasswork. You can make use of aluminum extrusions and lenses to mount in drywall. They can be used to frame a mirror. This provides an illuminated and stylish mirror design that will catch everyone’s attention and makes a great centerpiece for the room.
How to Put Lights Around a Mirror
You can put lights around the mirror with the use of LED light strips. Make sure that the lights are waterproof so that it is protected from the moist and humid environment of the bathroom. You can have the option of adding the lights in front or at the back of the mirror. See to it that you decide how you will position the mirror.
You cannot put lights on the back of any mirror that will be attached closely to the wall. On the other hand, if you are using a portable tabletop mirror that will not go against the wall, there is no need to add lights behind it. Leave at least an inch or two of a distance between the wall and the mirror. This way, the light strips that are attached at the back of the mirror can create a stunning lighting effect.
Below are the additional steps that you need to take when adding LED light strips into a mirror:
Clean the Mirror
Carefully clean the surface of the mirror. It should be spotlessly clean regardless you attach the lights at the back or front. Any dust and debris on the mirror will make it harder for the adhesive from sticking properly.
Dry the Mirror
Use a paper towel to dry the surface of the mirror. Like dust and debris, any moisture that is left after cleaning the mirror will make it harder for the adhesive to stick on the surface of the mirror.
Glue the LED Lights
Once the mirror is clean and dried, you can glue the light strips on the surface. Most LED light strips come with their own 3M super glue at the back. In case there is none, you need to use super glue that works for glass and plastic.
✅ Video – DIY Makeup Mirror with Light
The DIY Company shared the video below on how to make a DIY makeup mirror with light. It is a cheap and effective way to upgrade your makeup mirror. You can check out the video below for step-by-step instructions.
Which LED Light is Best for the Bathroom?
The best LED light bulbs for bathrooms are those that can provide clear and bright light that is similar to that of natural daylight conditions. This type of lighting emits colors more accurately and is ideal for makeup application, shaving, and grooming. You can also check out this article that discusses if vanity lights should hang over mirror. We have shared an in-depth discussion about the topic.
Are LED Lights Safe for the Bathroom?
To make sure that the LED light that you choose for your bathroom is safe, it should have an IP rating. These ratings are used to refer to the extent to which lighting fixtures can stop water from getting inside of them. You need to choose the correct IP rating for the bathroom zone where you will install it. Take note that when choosing bathroom lighting, there are special needs that you need to keep in mind. The bathroom is a moist and humid place. We are aware that water and electricity spell danger so you need to take extra precautions when choosing LED lights for your bathroom. You can also check out this article about the best LED underwater submersible pool lights. We have shared a list of products that you can choose from.
Are LED Mirrors Good for Makeup?
Yes, LED mirrors are ideal for makeup because they not only give off light that’s bright enough to give a well-lit reflection of your face, but they also provide balanced lighting. This allows you to see all of your features clearly from any angle. The light from LED mirrors is also similar to natural light, which is the best lighting for makeup application. You can check out this article that discusses if LED mirrors are good for makeup for more information.
Do LED Mirrors Provide Enough Light?
LED mirrors provide enough light for things that require a well-illuminated and clear reflection. These include grooming tasks such as shaving, applying and removing makeup, brushing and flossing teeth, and styling hair. You can also check out this article on how to add lights to a mirror. We have shared information that you can use if you want to redesign your mirror.
How Long Do LED Mirrors Last?
The lights in a LED mirror have an average lifespan of 50,000 hours or more. As they near the end of their life, their brightness lessens, which is a sign that they need to be replaced soon. Of course, the mirror glass itself can still be used at this time. For an in-depth discussion, check out this article about how long LED mirrors last.
Conclusion
In this article, we laid down the instructions for putting LED light on a mirror. We discussed what you need to prepare and the materials needed for the project. We also gave a few tips on installing the mirror once finished. We hope you have fun doing this DIY project. Enjoy using your lighted mirror!