This article is all about how you can make an LED backlit mirror. Backlit mirrors are great for everyday use, and they add a sense of drama to space, and it’s easy to see why they are steadily becoming more popular. What’s great is you can easily make your own LED backlit mirror.
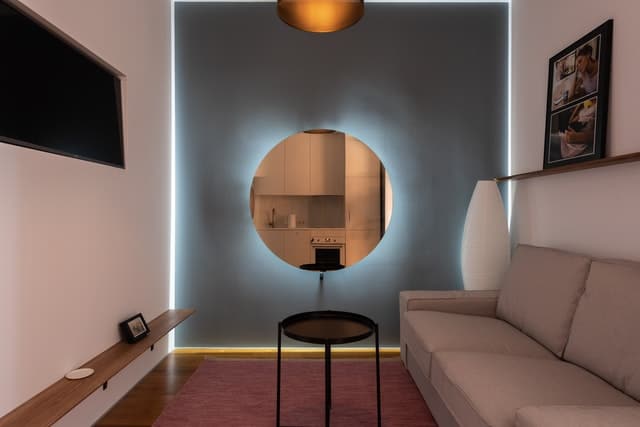
How do you make an LED backlit mirror? The simplest way to make an LED backlit mirror is to install LED lights around a base or wall mount frame behind a mirror and mount it on a wall. The mirror should be mounted so that there is a space between the wall and the mirror glass. The LED lighting system is then connected to a power source. When the LEDs are switched on, the light should project from behind the mirror and reflect off the wall to produce a soft backlit effect.
This is just a brief description of the major steps to take in making an LED backlit mirror. Below, we’ll discuss the process in greater detail.
What is the Process of Making an LED Backlit Mirror?
The steps for making a backlit mirror using LEDs involve identifying and preparing the area where you’ll be putting the mirror, acquiring the materials and tools you’ll need, preparing your work area, putting LED lights on the mirror, and finally, mounting the mirror on a wall to achieve that backlit effect. For this article, we will be laying down these steps for turning an existing regular mirror into a backlit mirror with LED lights.
Step 1: Identifying Mirror Placement
The first thing you need to do is identify where the mirror will be placed. Ideal spots for backlit mirrors are on a bathroom wall above the sink, a bedroom wall where you usually do your makeup, or a wall in the living room where it can be prominently seen. The place where you’ll be putting the mirror should have a power source or a wall outlet nearby.
Step 2: Checking the Location
The next step is to make sure the spot where you want to put the mirror can accommodate the mirror. You also need to make sure there is a power outlet nearby. If there is none, it’s recommended to hire an electrician who can help you out with the power requirements.
Mark the spot where you want the mirror to be and measure this space. This will give you an idea of the size of the mirror you’ll need to get.
Step 3: Acquiring Tools and Materials
For Step 3, you’ll need to acquire all the materials you’ll need. The most important materials to have are a mirror and LED strip lights. It would also be good to have a toolset on hand.
Step 4: Preparing Your Work Area
Since you’ll be working with a breakable item, it’s important to put safety first. Prepare a free work area from clutter and is spacious enough for you to move around in.
Step 5: Installing LED Lights
Step 5 is when the fun starts. This is when you put LED lights on the back of the mirror. We’ll discuss this step in more detail below.
Step 6: Hanging the Mirror
When you’re done attaching the lights and testing to see if they work, you can now mount the mirror on the wall you have identified. And that’s it–your new backlit mirror!
✅ Video – DIY Floating Glowing Mirror
This video, uploaded on YouTube by Kelly Harrison, shows how she made her backlit mirror using LED lights. She details the materials she used and the steps she took to turn an existing framed mirror into a backlit one. Watch the video to see this DIY project!
What are the Materials You’ll Need to Make an LED Backlit Mirror?
This project’s major components are a mirror, LED strip lights, and a power supply unit and connectors compatible with the LED strip.
Mirror
We recommend getting a floating mirror of the same or smaller size than the space you measured earlier. Why a floating mirror? It’s because it’s already designed to have a space between the mirror and the wall. A base or frame behind the mirror functions as a spacer, and this is where you’ll be attaching the lights.
When the LEDs are turned on, the light projects from this space, making the mirror glow from behind. This is the backlit effect we’re aiming for.
LED Lights
For this project, get LED strip lights. LED strip lights are easy to use and install. LED strips can be cut and are already fitted with adhesive, so you can easily attach these to the back of your mirror. LED strips are usually sold per roll or a specific length. We recommend choosing warm white LED lights because the lighting output is similar to daylight or natural light.
Power Supply Unit and Connectors
The LEDs you put on the mirror need electricity to work, so a power supply unit and connectors and cables are also necessary. The type and size of the power unit and the connectors should be compatible with the LED strip light.
All of these materials can be purchased from a hardware store. If purchasing online, it’s best to buy from the same manufacturer to ensure product compatibility.
What are the Steps in Attaching Lights to Make a Backlit Mirror?
Attaching the LED lights to a mirror to achieve a backlit effect involves several easy steps. These measure the perimeter of the mirror’s base or wall mount frame, cutting the LED strip to the appropriate length, connecting the strip to the power supply unit, testing the LEDs, and finally, sticking the light strip to the back of the mirror.
Measuring the Perimeter of the Mirror Base or Frame
Using a ruler or a tape measure, measure the mirror’s base (attached to the back of the mirror) or the outside of the mirror’s frame (the part that is mounted to the wall). Take note of the measurement and add an allowance of 1 inch. This is the length of the LED strip light you will use.
If your mirror is round, measure the circumference of the base behind the mirror.
Cutting the LED Strip Light
Take the LED strip light and cut it at the length you measured in the previous step. Remember to add 1 inch and cut the strip between two LED lights.
Connecting to the Power Unit
Connect the LED strip light to the power supply unit using compatible connectors, following the manufacturer’s instructions for proper installation. Then, plug the power supply unit’s cord into the designated wall socket. This step is important to check the power supply and the lights before attaching them to the mirror.
Attaching the Lights
If the lights are all in good working order, unplug the cord again. Wipe the mirror’s base or frame to make sure it’s clean. Peel off the LED strip’s adhesive backing and carefully stick the strip light around the mirror’s base or frame, taking care not to pull at the connectors. When done, you can test the lights again before finally hanging the mirror on the wall.
You can choose to keep the power supply unit by the wall socket or hide it behind the mirror or within the mirror’s frame.
How Do You Install the LED Backlit Mirror?
The mounting of the backlit mirror on the wall would depend on the manufacturer’s instructions for installation. In general, it involves mounting the frame on the wall first, then hanging the mirror onto the frame using the brackets or cleats on the base behind the mirror.
Because mirrors vary in style and construction, the installation process may differ from one mirror model to another. This is why it’s important to keep the mirror’s instruction manual handy and consult it when hanging the mirror on a wall. Make sure to follow the instructions provided so that the mirror is installed properly.
Once the mirror is installed, plug it in and check your handiwork. If you want the light to be a little brighter, you can always add another row of LED lights.
What’s the Difference between Backlit and Lighted Mirrors?
The difference between these two lies in the placement of their lighting systems. Backlit and lighted mirrors are installed with lights, but backlit mirrors specifically refer to those mirrors that have their lights placed behind them. The term “lighted mirrors” usually refers to those mirrors that have their lights placed on the mirror’s surface or around its side edges. You can also check out this article that talks about the difference between backlit and lighted mirrors for more information.
Are LED Mirrors Worth It?
LED mirrors are worth buying. LED mirrors have several uses, such as a grooming mirror and a wall accent. Using LED mirrors also offers several benefits, including balanced lighting for personal grooming purposes and a lower energy bill. LED bulbs are also low maintenance and last a long time. An LED mirror is an investment you won’t regret. For an in-depth discussion, check out this article titled, are LED mirrors worth it?
How Long do LED Mirrors Last?
High-quality LED bulbs can provide you with up to 50,000 hours of useful light before they need to be replaced. That’s more than 2,000 days of continuous use. If you only use the mirror lights for a maximum of six hours a day, that’s more than 8,300 days or nearly 23 years of LED lighting. For more information about the topic, you can check out this article about how long LED mirrors last.
How do You Add a Backlight to a Mirror?
You can add a backlight to a mirror by using LED light strips. Measure the length of the mirror, attach the light strips, and connect them to a power source. There are many kinds of LED lights that you can use and you can choose one according to your preferences. One of the easiest ways is to use LED light strips. It is a fun and easy project that you can do at home.
How are Backlit Mirrors Powered?
Backlit mirrors are usually powered by LED lights rather than incandescent lights. This is because LED lights use less energy. On the other hand, some backlit mirrors are also operated from the main power switch that can be connected behind the mirror.
Can You Cut LED Light Strips?
You can cut LED light strips. They are typically cut at 5 or 10 cm intervals depending on the type of strip that is purchased. Cutting points ate marked clearly with a straight line. Cut along the line with the use of a craft knife or scissors to separate the light strips.
✅ Video – How to Cut and Connect LED Light Strips
Parts Express shared the video below on how to cut and connect LED light strips. You can use LED light strips if you are planning to make a backlit mirror. Check out the video below for more tips and information.
How to Put LED Strip Lights on a Mirror
There are many ways to put an LED light strip in a mirror. Below is an easy DIY instruction that you can follow to upgrade the look of your mirror. It is an easy and affordable project that you can do.
Choosing LED Light Strip
There are different types of LED light strips sold on the market and the right one depends on your preferences, the look that you want to have for your mirror, and your budget. How do you choose the light strip for your mirror? Below are some factors that you need to consider.
Environment
Are you going to install the mirror in your bathroom or bedroom? Considering the environment of the room where you will place the mirror is important. If you will place it in a humid room, make sure that you have waterproof LED light strips.
Function
Another thing that you need to consider is the function of the light strip. You can opt for RGB color light strips and choose the right colors that match your mood. If you want a cool and relaxing ambiance, you can choose warm white or bright white.
Length
You also need to consider the length of the light strips. The longer ones are more expensive. You can cut the strip if it is too long or you can wrap it around the mirror twice. Make sure that you measure the size of the mirror so that you will have the exact length of the light strip.
Consider the Location
After purchasing the light strip, the next thing that you need to decide is where you will put it. You can install the lights in front or at the back of the mirror. Another option would be to follow the specific shape of the mirror.
Install the Strip Lights
Make sure that the surface of the mirror is thoroughly clean before applying the light strip. Most of the light strips come with 3M string glue at the back which you can directly attach to the mirror. When sticking the lights, make sure that there is no water on the mirror, or else, the glue will not stabilize the light strip.
Conclusion
In this article, we discussed a simple method of making an LED backlit mirror. We provided a step-by-step set of instructions, from identifying mirror placement and getting the needed materials to installing the LED lights and mounting the backlit mirror on the wall. It’s an enjoyable, beautiful, and truly satisfying DIY project.
We cannot overstress the importance of safety as you’ll be working with breakable glass and electricity, so don’t hesitate to ask for professional help when necessary. Have fun using your new LED backlit mirror!